Here’s a kitchen debate that’s been going on for decades: should you boil ribs before grilling? Ask ten backyard grillers, and you’ll get ten different opinions — half swearing by it, the other half acting like you just insulted their grandmother’s recipe.
The truth? It’s not as black-and-white as either side wants you to believe. Boiling ribs before grilling can actually work well in certain situations, but it can also ruin perfectly good meat if you don’t know what you’re doing. And the difference between “fall-off-the-bone tender” and “flavorless mush” often comes down to technique, timing, and what kind of ribs you’re working with.
So let’s break this down honestly — no gatekeeping, no BBQ snobbery. Just real, practical advice that’ll help you decide what works best for your kitchen, your grill, and your taste buds.
Why Do People Boil Ribs Before Grilling?
Before we get into whether you should do it, let’s understand why people do it in the first place.
The main reason is speed. A full rack of ribs can take 4 to 6 hours on a smoker. Not everyone has that kind of time on a Tuesday evening. Boiling (or more accurately, simmering) ribs for 30 to 45 minutes pre-cooks them and breaks down some of the tough connective tissue. After that, you just finish them on the grill for 15 to 20 minutes to get that char and caramelized sauce.
There’s also the tenderness factor. Ribs have a lot of collagen, and wet heat is one of the most efficient ways to convert that collagen into gelatin — which is what makes meat feel tender and juicy in your mouth. People who boil ribs often say they get “fall-off-the-bone” texture every single time, and they’re not wrong about that.
And then there’s the convenience angle. If you’re hosting a backyard party and you’ve got 5 racks to cook, pre-boiling lets you do most of the heavy lifting indoors. The grill time becomes just a quick finishing step — sauce, char, done.
These are all legitimate reasons. The question is: what are you giving up in exchange?
What Happens When You Boil Ribs
Here’s where it gets interesting, and where a lot of people don’t fully understand the trade-offs.
When you submerge ribs in boiling water (212°F / 100°C), several things happen simultaneously. The high, wet heat starts breaking down the collagen fairly quickly. That’s the good part. But the same water that’s tenderizing your meat is also pulling things out of it.
Fat renders out into the water. Some fat loss is fine — you don’t want greasy ribs. But fat is also flavor. Too much fat loss means your ribs will taste flat, no matter how much sauce you slap on.
Water-soluble proteins leach out. Ever notice that foamy stuff that rises to the top when you boil meat? Those are proteins and nutrients leaving your ribs and dissolving into the water. That’s flavor you can’t get back.
The meat’s natural juices dilute. Ribs absorb water during boiling, which temporarily makes them seem moist. But that absorbed water doesn’t behave like natural meat juices — it evaporates quickly on the grill, and you can end up with ribs that go from “waterlogged” to “dry” in a matter of minutes.
This is the core issue. You’re trading flavor and texture for speed and convenience. Whether that trade is worth it depends entirely on your priorities.
Pro Tip: If you’ve ever wondered about the right internal temperature for pork in general, the same principles apply here. Pork ribs are done when they hit 195°F to 203°F internally — that’s when collagen has fully broken down, regardless of how you cook them.
The Case FOR Boiling Ribs Before Grilling
Let’s be fair here. There are real, practical scenarios where boiling ribs makes sense.
You’re short on time. If you’ve got an hour total to get ribs on the table, boiling is your friend. You simply can’t achieve tender ribs on a grill alone in 60 minutes. The meat needs time to break down, and boiling accelerates that process dramatically.
You’re new to cooking ribs. Ribs can be intimidating. There’s a learning curve to low-and-slow cooking, temperature management, and knowing when they’re done. Pre-boiling takes a lot of the guesswork out. You simmer them until they’re tender, then just grill for flavor. It’s almost impossible to mess up.
You don’t own a smoker. Not everyone has a pellet smoker or a charcoal setup with indirect heat zones. If you’ve got a basic gas grill and a stockpot, boil-then-grill is a totally workable method.
You’re cooking for a crowd. When you need to feed 20 people and only have one grill, pre-boiling lets you batch-cook ribs ahead of time. You can even boil them a day early, refrigerate, and just finish on the grill when guests arrive.
Here’s something most articles won’t tell you: plenty of award-winning rib joints in the Northeast U.S. boil their ribs. It’s a regional style. Those sweet, saucy, fall-off-the-bone ribs you get at certain restaurants? Many of them are boiled first. It’s not “wrong” — it’s a different approach with a different result.
The Case AGAINST Boiling Ribs
Now, the other side. And these arguments are equally valid.
Flavor loss is real. No amount of seasoning or sauce can fully replace the deep, meaty flavor that gets lost during boiling. Dry-cooked ribs (whether smoked, oven-roasted, or slow-grilled) retain more of their natural pork flavor because nothing is leaching out into water.
Texture can suffer. There’s a fine line between “tender” and “mushy.” Boiled ribs sometimes cross that line, especially if you boil them too long. The meat can become so soft that it literally falls apart — not in a good, pull-apart way, but in a “this has no structure” way.
You lose the bark. If you’ve ever had properly smoked ribs, you know about the bark — that flavorful, slightly crusty exterior that forms during hours of low-and-slow cooking. Boiling makes bark formation nearly impossible. You’ll get some char on the grill, sure, but it’s not the same thing.
Smoke flavor doesn’t penetrate. Smoke adheres to moist, raw meat surfaces much better than to pre-cooked meat. If you boil first and then try to add smoke flavor on the grill, you’ll get minimal smoke absorption. The ribs will taste grilled, not smoked.
Competitive BBQ folks and pitmasters almost universally avoid boiling. In organizations like the Kansas City Barbeque Society (KCBS), boiling would be considered a disqualifying approach — not officially, but in practice. The standard is low-and-slow with dry heat and smoke.
If you want to explore how different temperatures affect rib cooking, check out this comparison of smoking ribs at 250 vs 275. The temperature difference is small, but the results are noticeably different.
A Better Alternative: Simmering, Not Boiling
Here’s the thing most people get wrong — they say “boil” when they should be saying “simmer.”
There’s a real difference. Boiling means a full, rolling boil at 212°F. That’s aggressive. It bounces the meat around, tears apart the fibers too fast, and drives out more flavor than necessary.
Simmering is gentler — around 185°F to 200°F. The water has small bubbles rising lazily to the surface, not a violent churn. Simmering breaks down collagen almost as effectively as boiling, but it’s far kinder to the meat. Less flavor loss, less texture damage, better results.
If you’re going to pre-cook ribs in liquid, always simmer. Never let it hit a full boil.
And here’s a trick that makes simmering even better: don’t use plain water. Build flavor into the liquid itself.
Add some of these to your simmering pot: apple cider vinegar (a splash), a few garlic cloves, onion quarters, bay leaves, peppercorns, or even a cup of apple juice. Some people use beer. The idea is that while the ribs are losing some flavor to the liquid, the liquid is also pushing flavor back into the meat. It won’t fully compensate for what’s lost, but it closes the gap significantly.
After simmering, pat the ribs dry with paper towels before grilling. This step matters. Dry surfaces sear and caramelize better. Wet ribs on a grill just steam, and you end up with rubbery, pale meat instead of nice grill marks and char.
How to Boil Ribs Before Grilling (Step by Step)
If you’ve decided to go the boil-then-grill route, here’s how to do it right. The details matter more than you’d think.
Start with prep. Remove the membrane from the back of the ribs if it’s still attached. That thin, papery layer on the bone side doesn’t break down well during cooking and creates a chewy, unpleasant texture. Slide a butter knife under a corner, grab it with a paper towel, and peel it off in one piece.
Season the water. Fill a pot large enough to hold the ribs without cramming them. Add salt, a tablespoon of apple cider vinegar, garlic, onion, and whatever aromatics you like. Bring it to a boil, then reduce to a simmer.
Add the ribs and simmer. Place the ribs in the simmering liquid. If you need to cut the rack in half to fit your pot, that’s fine. Simmer for 30 to 45 minutes — no more. Baby back ribs need closer to 30 minutes. Spare ribs, which are larger and tougher, can go 40 to 45 minutes. If you go past an hour, you’re heading into mushy territory.
Check for doneness. The ribs should be tender but not falling apart. You want them to still hold together on the bone. If you pick up the rack with tongs from one end and it bends sharply but doesn’t break in half, you’re in the right zone.
Dry and season. Remove the ribs, let them cool slightly, then pat them thoroughly dry. Now apply your dry rub. Yes, rub them after boiling, not before. Any rub applied before boiling just washes off into the water. Some people apply a light rub before boiling for flavoring the liquid, then apply a second heavier rub before grilling — that works too, but it’s extra effort.
Grill hot and fast. Preheat your grill to medium-high heat — around 375°F to 400°F. Place the ribs directly on the grate, bone side down first. Grill for about 5 to 7 minutes per side. Apply your barbecue sauce in the last 5 minutes to let it caramelize without burning. Watch the heat carefully because sugar-based sauces burn quickly.
Knowing how many ribs are in a rack helps with planning portions, especially when you’re cooking for a group and trying to time everything right.
What About the Oven? A Middle Ground
A lot of people who don’t want to boil but also don’t have 5 hours to smoke find a great compromise in the oven.
You wrap your seasoned ribs tightly in aluminum foil and bake them at 275°F for 2.5 to 3 hours. The foil traps moisture, creating a steam environment that tenderizes the meat — similar to boiling, but without submerging in water. The ribs cook in their own juices and rendered fat, so the flavor stays in the meat instead of dissolving into a pot of water.
After the oven, you finish on the grill the same way — hot, fast, with sauce applied at the end.
This method gives you tender ribs with much better flavor retention than boiling, and it doesn’t require a smoker. It’s the approach many home cooks land on once they’ve tried both boiling and full-grill methods.
Should you be wondering whether to cook ribs bone up or down, that guide breaks down the difference and when each position makes sense.
Does the Type of Ribs Matter?
Absolutely. Not all ribs respond to boiling the same way.
Baby back ribs are leaner and more tender to begin with. They come from the upper part of the rib cage, closer to the loin. Because they’re already relatively tender, they don’t need boiling to become enjoyable. If you do boil them, keep it to 25-30 minutes max. They overcook easily.
Spare ribs are larger, fattier, and have more connective tissue. They benefit more from pre-cooking methods because they need more time to break down. If you’re going to boil any rib cut, spare ribs handle it better than baby backs. They can take 40-45 minutes of simmering without turning to mush.
St. Louis style ribs are spare ribs with the rib tips trimmed off, creating a more uniform rectangular rack. They cook very similarly to spare ribs and respond to boiling the same way.
Country-style ribs aren’t actually ribs at all — they’re cut from the shoulder or blade end of the loin. They’re meaty, boneless (usually), and very tough without proper cooking. These actually do quite well with a boil-then-grill approach because they’re so thick and dense.
Understanding what cut you’re working with changes the answer to “should I boil?” quite a bit. If you’re interested in how different cuts of pork compare, the breakdown of pulled pork internal temperature explains how connective tissue works in larger pork cuts.
What Professional Pitmasters Actually Think
Let’s address the elephant in the room. Most professional BBQ pitmasters don’t boil ribs. That’s a fact. But the reason they don’t isn’t necessarily because the end result is always terrible — it’s because they have the equipment, time, and expertise to achieve tenderness through other methods.
A pitmaster with a custom offset smoker, years of experience reading fire and smoke, and an entire afternoon to dedicate to cooking has no reason to boil ribs. Their dry-heat method produces superior results in terms of flavor depth, bark development, and smoke ring.
But that pitmaster isn’t cooking on a $150 gas grill on an apartment balcony with 45 minutes before dinner. Context matters.
Aaron Franklin, one of the most respected pitmasters in Texas, has said that great BBQ comes from understanding your equipment and your situation. You work with what you have.
So if a professional tells you “never boil ribs,” ask yourself: do you have the same setup they have? If not, their advice — while technically sound — might not apply to your kitchen the same way.
The Flavor Problem (And How to Fix It)
The biggest complaint about boiled ribs is the flavor — or rather, the lack of it. But there are ways to fight back.
Season the boiling liquid aggressively. Think of it like making a broth. Onion, garlic, celery, peppercorns, bay leaves, chili flakes, soy sauce, Worcestershire — all of these add flavor to the water, and some of that flavor migrates into the meat.
Use a bold dry rub after boiling. Since the ribs lose some of their inherent porkiness during boiling, you need a rub that does heavy lifting. Go heavier on brown sugar, smoked paprika, garlic powder, and cayenne than you normally would. The rub’s job is to compensate for lost flavor.
Choose a thick, flavorful sauce. Thin vinegar-based sauces won’t cut it here. You want a thick, sweet, slightly tangy sauce that builds layers of flavor during grilling. Apply it in stages — a thin layer 10 minutes before the ribs come off, another layer right at the end.
Add liquid smoke. This is controversial in BBQ circles, but a few drops of liquid smoke in your boiling water can mimic some of the smokiness you’d get from a smoker. It won’t fool a pitmaster, but for a weeknight dinner? It works surprisingly well.
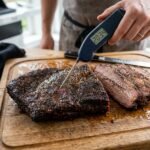
If you’re someone who pays attention to how to read a meat thermometer properly, you’ll get much more consistent results with boiled-then-grilled ribs. Pulling them at the right internal temp prevents overcooking during the grill phase.
Common Mistakes When Boiling Ribs
Even if you decide boiling is the right call for your situation, there are a few pitfalls that trip people up.
Boiling too long is the biggest one. Past the 45-minute mark, your ribs start losing structural integrity fast. The meat becomes grainy, the bones slip out too easily, and the texture goes from tender to unpleasantly soft. Set a timer.
Using a full rolling boil is the second mistake. As we talked about earlier, simmering is gentler and more forgiving. A violent boil agitates the meat, tears fibers apart unevenly, and drives out more flavor. Keep the heat low enough that you see lazy, gentle bubbles — not a jacuzzi.
Skipping the drying step before grilling is surprisingly common. Wet ribs don’t get good grill marks. They steam instead of sear. Spend 60 seconds patting them dry with paper towels. It makes a noticeable difference in the final result.
Applying dry rub before boiling wastes your seasoning. It all dissolves into the cooking water. Save your spice blend for after you pull the ribs from the pot.
Grilling at too low a temperature after boiling is another mistake. The ribs are already cooked — the grill step is about developing crust, charring the sauce, and adding Maillard reaction flavor. You want medium-high to high heat for this. Low-and-slow on the grill after boiling just dries the ribs out without adding anything useful.
So, Should YOU Boil Ribs Before Grilling?
Here’s the honest, no-gatekeeping answer.
Boil your ribs if: you’re short on time, you’re feeding a crowd, you’re working with basic equipment, you prefer the very soft “fall-off-the-bone” style, or you’re a beginner who wants a foolproof method.
Skip the boiling if: you have time for low-and-slow cooking, you own a smoker or can set up indirect heat on your grill, you want maximum pork flavor, you care about bark and smoke ring, or you’re cooking for people who appreciate traditional BBQ texture.
Try the oven-then-grill compromise if: you want better flavor than boiling but don’t have the time or equipment for smoking.
There’s no single right answer here. There’s only what works for you, today, with the time and tools you have. Anyone who tells you there’s only one way to cook ribs is confusing their preference with a universal rule.
FAQ
Does boiling ribs make them tough?
Not if done correctly. Boiling (really simmering) actually makes ribs more tender by breaking down collagen. The risk is the opposite problem — making them too soft and mushy. If you keep your simmer time under 45 minutes and use gentle heat, your ribs should come out tender without being tough or falling apart.
How long should I boil ribs before grilling?
Baby back ribs need about 25 to 30 minutes of simmering. Spare ribs and St. Louis cut ribs can go 35 to 45 minutes. Country-style ribs, which are thicker and denser, might need a full 45 minutes. Always simmer, don’t boil at full blast, and check the ribs at the earlier end of the time range.
Can I boil ribs the day before grilling?
Yes, and it’s actually a great strategy for parties and meal prep. Simmer the ribs, let them cool, wrap tightly in plastic wrap or foil, and refrigerate for up to 24 hours. When you’re ready, bring them to room temperature for about 20 minutes, apply your rub and sauce, and grill. Some people say overnight refrigeration actually helps the texture firm up a bit, giving you better results on the grill the next day.
Is boiling ribs the same as braising?
No, they’re different techniques. Boiling means fully submerging the meat in water at or near 212°F. Braising uses a small amount of flavorful liquid (not enough to cover the meat) in a covered pot, usually in the oven at a lower temperature around 300°F to 325°F. Braising retains more flavor because less of the meat contacts the liquid directly, and the covered environment creates steam that bastes the meat. If you have the option, braising is the better pre-cooking method.
What’s the best temperature to grill ribs after boiling?
Aim for 375°F to 400°F on the grill. Since the ribs are already fully cooked, you’re just building crust and caramelizing sauce. At this temperature, you need about 5 to 7 minutes per side. Keep a close eye on them because pre-boiled ribs can go from perfectly charred to burnt quickly, especially once sauce is applied.
Your Ribs, Your Rules
At the end of the day — wait, scratch that. Here’s what really matters.
Ribs are supposed to be fun. They’re supposed to be messy, satisfying, and the kind of food that makes people reach for a second rack even when they said they were full. Whether you get there through 6 hours of oak smoke or 30 minutes of simmering followed by a hot grill, the only opinion that counts is the one from the person eating them.
If you boil your ribs and your family loves them? That’s a win. If you smoke them low-and-slow and your friends fight over the last piece? Also a win. The best method is the one that gets you cooking, experimenting, and enjoying the process.
So pick the approach that fits your day, grab your tongs, and get cooking. Your ribs are waiting.