You spent 12 hours smoking a brisket. The bark looks perfect. The smell is incredible. Then you grab a knife and start slicing — and suddenly those beautiful slices are falling apart, chewy, or just plain wrong.
This happens to more people than you’d think. And almost every time, the problem isn’t the cook. It’s the cut.
Slicing brisket isn’t complicated, but there are a few things you absolutely have to get right — the resting time, finding the grain, the angle of your knife. Miss even one of these and you’ll turn a 12-hour masterpiece into something that chews like rubber.
This guide walks you through exactly how to slice brisket in 5 clear steps. Whether you’re working with a full packer or just the flat, you’ll know exactly what to do — and why it matters.
Why Slicing Actually Makes or Breaks Your Brisket
Most people think the smoking process determines everything. It matters a lot, sure. But slicing is the last thing that happens before the meat hits someone’s plate. Get it wrong, and none of the hours you put in will show up in the final bite.
Brisket is made up of long muscle fibers. When you slice with the grain, those fibers stay intact — so each bite is like pulling on a rope. Long, chewy, tough. When you slice against the grain, you’re cutting those fibers short. The result? Tender, clean slices that hold together and melt in your mouth.
That one decision — which direction you cut — changes everything.
And before you even get to the knife, there’s another factor most people skip: resting. A brisket that hasn’t rested properly will lose all its juice the moment you cut into it. You’ll see it pooling on the cutting board while your meat goes dry. Not ideal.
So let’s fix both of these things — and everything in between.
Step 1: Let the Brisket Rest (Don’t Skip This)
Pull your brisket off the smoker and the first thing you want to do is… nothing. Just let it sit.
Resting allows the muscle fibers to relax and the internal juices to redistribute throughout the meat. If you slice too early, those juices run straight out onto your cutting board instead of staying in the brisket where they belong.
How long should you rest brisket? At minimum, 1 hour. Ideally, you want 1.5 to 2 hours for a full packer brisket. Some pitmasters push it to 4 hours by wrapping the brisket in butcher paper and placing it in a dry cooler (no ice). This is called the “faux Cambro” method and it works really well for keeping the meat warm without overcooking it.
Knowing when to pull brisket off the heat at the right time makes this resting window even more effective — so if you’re not sure about that, it’s worth a quick read before your next cook.
Pro Tip: Don’t tent loosely with foil if you want to preserve your bark. Wrap tight with butcher paper or just let it rest uncovered for the first 15 minutes to keep that crust intact.
Step 2: Set Up Your Cutting Station
This sounds obvious, but a bad setup leads to bad cuts. Before you unwrap that brisket, get your station ready.
You’ll need:
- A large cutting board — brisket is a big piece of meat, and you need room to work
- A long slicing knife (12–14 inches), either straight-edge or Granton-edge. A Granton blade has those oval indentations along the side that prevent the meat from sticking to the blade
- A sharp edge — a dull knife drags and tears instead of cutting clean
Don’t use a serrated bread knife. It’ll shred the surface of your slices and destroy the texture you worked so hard to create. A long, sharp slicing knife is the right tool here, full stop.
If your knife has been sitting in a drawer for months, run it through a honing rod or get it sharpened before the cook. You’ll feel the difference immediately.
Place a damp towel under your cutting board so it doesn’t slide around while you’re working. Small thing, big difference.
Step 3: Separate the Flat and the Point
A full packer brisket has two muscles: the flat and the point. They’re attached, but they run in different directions. This is the part where a lot of people go wrong — they try to slice the whole brisket without separating these two sections, and end up cutting in the wrong direction for at least half the meat.
The flat is the leaner, thinner section. It’s the one most people picture when they think of brisket slices. The grain runs in one consistent direction, making it easier to work with.
The point is thicker, fattier, and sits on top of the flat at an angle. This is where your burnt ends come from. Its grain runs at a different direction than the flat — which is exactly why you need to separate them before slicing.
Look at the fat seam between the two muscles. You’ll be able to see where they meet. Run your knife along that seam, following the fat layer, until the two pieces come apart cleanly. Don’t worry about being too precise — you’re not performing surgery. Just follow the natural separation.
Once they’re apart, set the point aside for a moment and focus on the flat first.
If you’ve been working with a brisket flat only (not a full packer), this step doesn’t apply — you can go straight to slicing. Learn more about the difference between brisket flat and packer cuts if you’re not sure what you’re working with.
Step 4: Find the Grain and Slice Against It
This is the most important step.
Before you make a single cut, look at the surface of the meat. You’ll see lines running through it — those are the muscle fibers, or “the grain.” Your job is to cut perpendicular to those lines, not parallel to them.
A simple test: try pulling the meat apart with your fingers in both directions. One way it’ll resist and feel tough. The other way it’ll pull apart more easily — that’s against the grain, and that’s the direction you want your knife going.
How thick should brisket slices be? The classic answer is “pencil thick” — roughly ¼ inch. Too thin and the slices fall apart. Too thick and they get chewy. That ¼-inch sweet spot gives you slices that hold their shape but still pull apart tenderly with each bite.
Keep your slices consistent. Use long, smooth strokes with your knife rather than short sawing motions. Let the weight of the knife do the work. Sawing back and forth compresses the meat and tears the surface.
Slicing the point: Once you’re done with the flat, turn to the point. Look at the grain direction again — it’ll be different from the flat. Reorient the meat so you’re still cutting against the grain. The point has more marbling and fat, so the slices will look different, but they should still be about ¼ inch thick.
If you want burnt ends instead of slices from the point, cube it up into 1–1.5 inch pieces and you’re good to go.
Step 5: Serve Immediately or Store Properly
Brisket starts losing moisture the moment it’s sliced. So if you’re serving a crowd, slice to order rather than cutting everything at once and letting it sit out.
If you’re serving a large group and need to pre-slice, keep the sliced brisket in a covered pan with a little of the collected juices or beef broth poured over the top. This keeps it moist and prevents the edges from drying out.
For leftovers, let the slices cool slightly before storing. Lay them in an airtight container or wrap tightly in foil. They’ll keep in the fridge for 3–4 days. Knowing how to reheat brisket the right way matters just as much — low and slow with a splash of liquid is your best bet for keeping that moisture locked in when you warm it back up.
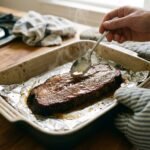
Pro Tip: Save every drop of the juices that collect in the foil or butcher paper after resting. That liquid is pure flavor. Pour it back over sliced brisket when serving or storing — it makes a real difference.
Common Mistakes That Ruin Good Slices
Cutting with the grain instead of against it. This is the number one error. If your brisket slices are chewy despite a perfect cook, this is almost certainly why. Take an extra 30 seconds to identify the grain direction before you make your first cut.
Not separating the flat and point. These two muscles have different grain directions. If you slice them together as one piece, at least half your cuts will be going the wrong way.
Using the wrong knife. A short or dull knife forces you to saw through the meat. Get a proper long slicing knife and keep it sharp.
Slicing too early. Cutting into a brisket that hasn’t rested long enough is like poking a hole in a water balloon. The juices escape and you’re left with dry meat. Give it at least an hour, no exceptions.
Slices that are too thick. Some people go for chunky slices thinking it looks more impressive. But anything over ½ inch starts getting tough to eat. Stick to ¼ inch and your guests will thank you.
Understanding Brisket Before You Slice It
Slicing correctly is easier when you understand what you’re working with. Brisket comes from the lower chest of the cow — it’s a working muscle that carries a lot of the animal’s weight, which is why it has such dense connective tissue. That connective tissue breaks down during long, slow cooking, which is what gives properly smoked brisket its tenderness.
If you want a deeper look at the anatomy before your next cook, the guide on what part of the cow brisket comes from explains it clearly. And if you’re still dialing in your cook temps, smoking brisket at 225°F is a good place to start for getting the base cook right before slicing comes into play.
The target internal temperature also plays a role. A brisket that’s pulled too early — before the collagen has fully broken down — will be tough no matter how perfectly you slice it. Most pitmasters aim for 195°F to 205°F in the thickest part of the flat. The brisket internal temp at 210°F guide explains when pushing slightly higher actually makes sense.
FAQ
Q: Does it matter which end of the brisket I start slicing from?
Yes, it does. Start slicing from the flat end (the thinner, leaner side). This gives you the most consistent slices early on. As you work toward the thicker point end, the meat changes — more fat, different grain — which is your signal to separate the two muscles if you haven’t already.
Q: What if I can’t find the grain direction easily?
On a freshly cooked brisket, the grain can be hard to see because the surface is dark from the bark. Try this: cut a thin slice off one end of the flat and look at the cross-section. You’ll see the muscle fibers clearly. That tells you exactly which direction the grain runs on the whole piece.
Q: My brisket slices keep falling apart. What am I doing wrong?
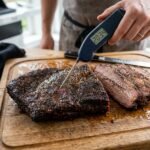
A few things could cause this. The slices might be too thin. The brisket might be overcooked and the muscle fibers have completely broken down. Or you’re cutting with the grain instead of against it — counterintuitively, cutting against the grain actually holds slices together better because you’re shortening the fibers rather than leaving them long and loose. Check your internal temp next time using a reliable meat thermometer; overcooking is a common cause of slices that crumble.
Q: Can I slice brisket ahead of time for a party?
You can, but it’s not ideal. Pre-sliced brisket dries out faster than whole brisket. If you must pre-slice, store the slices in a covered pan with some beef broth or the collected resting juices poured over the top. Keep it warm in an oven set to around 170°F until serving time.
Q: Do I need a special knife to slice brisket?
You don’t need an expensive one, but you do need the right type: a long (12–14 inch) slicing knife with a thin, flexible blade. A Granton-edge blade (with oval indentations) helps prevent sticking. What you shouldn’t use is a short chef’s knife or a serrated bread knife — both will make the job harder and the slices messier.
Getting It Right From the First Cut
A great brisket deserves a great slice. After all the hours you put into the cook — the seasoning, the smoke, the temperature monitoring — the last five minutes at the cutting board matter more than most people realize.
Rest it long enough. Separate the flat from the point. Find the grain and cut against it, every single time. Keep your slices consistent at ¼ inch. And serve it fast.
Do those five things and you’ll go from pulling apart mystery chunks to laying down clean, beautiful slices that actually show off your work. That’s the whole game.
Your knife is ready. Go get it.