Most recipes say “bring to a simmer” like it’s the most obvious thing in the world. But if you’ve ever stood in front of your stove wondering whether those tiny bubbles mean you’re simmering or just staring at warm water — you’re definitely not alone.
Here’s the quick answer: a simmer sits between 180°F and 205°F (82°C–96°C). That’s below a full rolling boil (212°F / 100°C) but well above the point where water just sits there doing nothing. The tricky part? Your stove doesn’t have a dial that says “simmer.” It says Low, Medium, High — and every stove behaves a little differently.
So let’s break this down properly. You’ll know exactly what a simmer looks like, how to hit the right temperature on YOUR stove, and why this one skill can seriously improve your cooking.
What Exactly Does “Simmer” Mean in Cooking?
A simmer is gentle cooking. Think of it as the calm, controlled cousin of a boil. The liquid is hot enough that you see small bubbles rising lazily to the surface — maybe one or two every second — but it’s nowhere near the violent, rolling action of a full boil.
The word itself comes from an old English term meaning “to keep at a gentle heat,” and that’s exactly what it is. You’re maintaining enough heat to cook food through, break down tough fibers, and meld flavors together — without the aggressive turbulence that can tear apart delicate ingredients.
Pro Tip: If your pot looks like a hot tub with lots of gentle activity, you’re simmering. If it looks like a jacuzzi on full blast, you’ve gone too far.
There are actually a few variations of simmering that experienced cooks talk about, and understanding them makes a real difference:
Low simmer sits around 180°F–190°F. You’ll barely see any movement on the surface. Maybe a bubble breaks through every few seconds. This is perfect for stocks, delicate sauces, and anything that needs to cook for hours without reducing too fast.
Regular simmer hovers between 190°F–200°F. You’ll see steady, small bubbles consistently rising from the bottom. This is what most recipes mean when they simply say “simmer.” Soups, stews, curries, and braises all live in this range.
Rapid simmer pushes toward 200°F–205°F. The bubbles are more frequent and a bit larger, but it’s still not a boil. Some cooks call this a “gentle boil,” and it’s useful when you want to reduce a sauce fairly quickly or cook pasta-adjacent dishes.
The reason temperature matters so much here is that each type of simmering produces different results. A chili that simmers gently for three hours develops completely different flavor depth than one blasted at a boil for 45 minutes. The science behind it involves how proteins denature, how collagen converts to gelatin in meats, and how volatile flavor compounds either stay in the pot or escape with steam. Slow, gentle heat keeps more of the good stuff in your food.
What Number on the Stove Is a Simmer?
This is the question everyone actually wants answered — and unfortunately, there’s no single universal answer. But don’t worry, I’ll get you as close as possible.
On a 1–10 dial stove, a simmer typically falls between 3 and 4. Some stoves run hotter, so you might need a 2. Others are weaker, and you might need a 5. The exact number depends on your specific burner, the type of stove, and even the size and material of your pot.
On a Low-Medium-High stove, you’re looking at somewhere between low and medium-low. Start at medium to get the liquid up to temperature, then dial it back.
Here’s a practical way to find YOUR stove’s simmer setting. Fill a pot with water, bring it to a full boil on high, then slowly turn the dial down. Watch the surface carefully. When those rolling bubbles calm down to gentle, occasional bubbles — that’s your simmer. Note the dial position. It’ll be roughly the same every time you use that burner with a similar-sized pot.
Gas stoves tend to respond quickly. You turn the flame down, and the temperature drops almost immediately. This makes them very forgiving for simmering — you can make micro-adjustments on the fly and see results within seconds.
Electric coil stoves are a different story. They hold heat much longer, so when you turn the dial down, the burner stays hot for a while. If your simmer starts creeping toward a boil on an electric stove, you might actually need to lift the pot off the burner for 30 seconds while the coil cools. It’s a bit of a dance, but you get used to it.
Induction stoves offer the most precise control. Many modern induction cooktops even have a dedicated simmer setting. Because induction directly heats the pan rather than the air around it, temperature changes happen almost instantly — similar to gas but even more responsive.
Glass-top (radiant) electric stoves fall somewhere in between. They respond faster than old coil stoves but slower than gas or induction. Keep an eye on your pot and adjust gradually.
If you cook a lot of dishes that require precise temperature control — like making sauces, poaching eggs, or getting fish to the perfect internal temperature — knowing your stove’s personality is half the battle.
Simmer vs. Boil — What’s the Real Difference?
People often use “simmer” and “boil” interchangeably, but they produce very different results in your cooking.
A full boil happens at 212°F (100°C) at sea level. The entire surface of the liquid is in violent motion — large bubbles rapidly breaking the surface, steam pouring off, and a lot of agitation in the pot. A simmer, as we’ve discussed, is that calm 180°F–205°F zone with gentle, small bubbles.
Why does this matter? Because the level of agitation directly affects your food.
Take a chicken soup, for example. If you boil the chicken aggressively, the proteins release quickly and emulsify into the broth, making it cloudy and sometimes greasy. The meat itself can turn stringy and dry. But if you simmer that same chicken gently, the broth stays clearer, the meat stays tender, and the flavors develop more gradually and deeply.
The same principle applies to sauces. A tomato sauce that simmers for an hour concentrates flavors beautifully. That same sauce at a hard boil will splatter all over your stovetop, reduce too quickly, and can develop a slightly bitter, scorched taste at the bottom of the pot.
There are times when you absolutely WANT a boil — cooking pasta, blanching vegetables, or getting a large pot of water up to temperature quickly. But once the food is in and cooking, most recipes tell you to reduce to a simmer for a reason.
One place where this simmer-vs-boil distinction really shows up is in meat cooking. Whether you’re braising a shoulder roast or simmering pulled pork on the stove, keeping that gentle temperature is what transforms tough connective tissue into fork-tender, fall-apart texture. Boiling the same cut just tightens the muscle fibers and gives you chewy, dry meat.
Why Simmering Temperature Matters for Different Dishes
Different dishes need different levels of simmer, and understanding this can genuinely transform your cooking.
Soups and Stocks
A good stock — chicken, beef, or vegetable — wants a low simmer around 180°F–190°F. You’re extracting flavor from bones, vegetables, and aromatics over several hours. Too much heat and your stock turns cloudy from emulsified fats and proteins. Classic French cooking technique specifically calls for a stock to “smile” — just a few bubbles lazily breaking the surface. That’s the sweet spot.
Braises and Stews
This is regular simmer territory — 190°F–200°F. You want consistent, gentle heat to break down the collagen in tough cuts of meat. A beef stew or braised brisket benefits enormously from patience at this temperature. The connective tissue slowly converts to gelatin, which is what gives braised dishes that rich, silky body.
Sauces and Reductions
Sauces can range anywhere in the simmer spectrum depending on what you’re making. A delicate beurre blanc needs low simmer to prevent the butter from breaking. A hearty bolognese can handle a higher simmer since you actually want some reduction and concentration. A quick pan sauce after searing a steak to your preferred doneness might use a rapid simmer to reduce the liquid in just a few minutes.
Grains, Beans, and Legumes
Rice, lentils, dried beans — all of these cook best at a gentle simmer with a lid on. Too much heat and the outsides of the grains turn mushy before the insides are fully cooked. A steady, low simmer gives you even cooking and better texture.
Poaching
Poaching eggs, fish, or chicken happens at the very low end of the simmer range — around 160°F–180°F. You want the liquid barely moving. If you see active bubbling when poaching, you’re too hot, and your poached eggs will turn into ragged wisps instead of neat little parcels.
Did You Know? The reason simmering develops deeper flavors than boiling has to do with something called the Maillard reaction at the surface and the gradual extraction of glutamates from ingredients. Long, slow cooking at simmer temperatures pulls out more umami from meats, tomatoes, mushrooms, and other savory ingredients. It’s chemistry working in your favor — you just have to give it time.
How to Maintain a Steady Simmer (Practical Tips)
Getting to a simmer is one thing. Keeping it there for an hour — or three — is another challenge entirely. Here are some genuinely useful techniques that actually work.
Use the Right Size Burner
Match your pot to your burner. A small pot on a huge burner makes temperature control harder because the heat wraps around the sides and creates hot spots. A large stockpot on a tiny burner might struggle to maintain even a low simmer. The best match is a burner that’s roughly the same diameter as the bottom of your pot.
Start Hot, Then Back Off
Bring your liquid to a boil on medium-high or high heat, then reduce the flame to find your simmer. This approach is faster and actually gives you more control than trying to slowly creep up to a simmer from cold. Once those big, rolling bubbles appear, turn the dial down gradually until you see the gentle bubble pattern you want.
The Lid Makes a Difference
Putting a lid on your pot traps heat and steam, which means you’ll need a lower dial setting to maintain the same simmer. A partially covered pot — lid tilted to leave a small gap — is a classic chef’s trick for simmering. It lets some steam escape (preventing pressure buildup and boiling over) while keeping enough heat in the pot to maintain temperature.
If a recipe says “simmer uncovered,” it usually means the chef wants the liquid to reduce and concentrate. That’s intentional. Don’t slap a lid on just because you think it’ll cook faster — you’ll end up with a watery sauce instead of a rich, thick one.
Use a Thermometer if You’re Unsure
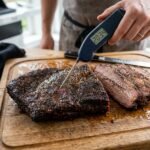
There’s absolutely no shame in using an instant-read meat thermometer to check your liquid temperature. Clip it to the side of the pot or just dip it in periodically. If you see 195°F, you’re right in the sweet spot. If you see 212°F, you’re boiling — turn it down. Over time, you’ll develop an eye for what a simmer looks like on YOUR stove, and you won’t need the thermometer anymore.
Stir Occasionally
Stirring does two things. It prevents food from sticking to the bottom (especially thick sauces, chili, or anything with tomato). And it redistributes heat, ensuring even cooking throughout the pot. For thin, brothy liquids, an occasional stir is fine. For thick stews and sauces, stir every 10–15 minutes.
⚠️ Warning: With thick liquids like tomato sauce or chili, the bottom of the pot can be much hotter than the surface. You might think you’re at a gentle simmer based on what you see on top, but the bottom layer could be scorching. Stir, scrape the bottom, and adjust heat if you notice anything sticking.
Does Altitude Affect Simmer Temperature?
Yes, and this is something most cooking articles overlook. If you live at higher elevations — say Denver, Colorado (5,280 feet above sea level) or anywhere in mountainous regions — water boils at a lower temperature than the standard 212°F.
At 5,000 feet, water boils around 203°F. At 7,500 feet, it’s closer to 198°F. This means your simmer range also shifts downward. What would be a simmer at sea level might actually be closer to a boil at altitude.
The practical impact? Foods take longer to cook at high altitude because the maximum liquid temperature is lower. Beans, stews, and braises all need extra time. Some high-altitude cooks use pressure cookers to compensate, since the increased pressure raises the boiling point back up.
If you live above 3,000 feet and your recipes always seem to take longer than the stated cook time, altitude is almost certainly a factor. Adjust your expectations and add 15–25% more cooking time for simmered dishes.
Common Mistakes People Make When Simmering
Cooking is forgiving most of the time, but a few simmering mistakes can genuinely ruin a dish. Here’s what to watch out for.
Walking away and forgetting about it. A simmer can creep up to a boil if your stove’s thermostat isn’t perfectly consistent or if a lid traps too much heat. Check your pot every 15–20 minutes, especially during the first hour when you’re still dialing in the temperature.
Turning the heat up to “speed things up.” This one’s tempting. Your stew has been going for an hour and the meat still isn’t tender. So you crank the heat, thinking higher temperature equals faster cooking. But with braised meats, higher heat actually tightens the muscle fibers more before the collagen has time to break down. You end up with tough, dry meat swimming in hot liquid. Patience is the real secret ingredient.
Not adjusting after adding cold ingredients. If you’re simmering a soup and you add a bunch of cold vegetables or frozen stock, the temperature drops significantly. You’ll need to briefly increase heat to bring it back to a simmer, then reduce again. Don’t just assume it’ll recover on its own — it might, but it could take 10–15 minutes, throwing off your cooking timeline.
Using the wrong pot. Thin, cheap pots develop hot spots and make maintaining an even simmer almost impossible. Heavy-bottomed pots (stainless steel, enameled cast iron like Le Creuset or Staub, or even a good quality Dutch oven) distribute heat more evenly and hold temperature better. If you’re serious about soups, stews, and braises, a heavy-bottomed pot is one of the best investments you’ll make.
When you’re cooking something like a meatloaf sauce or gravy alongside your main dish, a steady simmer ensures everything comes together at the right time without any element being over or undercooked.
Simmering on Different Cooktop Types — Quick Reference
Since every stove is different, here’s a practical breakdown of how to find and maintain a simmer on each type:
Gas stovetop: Start on medium flame, bring liquid to a boil, then reduce to low or low-medium. The visual cue with gas is easy — you want a small, steady blue flame, not a roaring one. Adjust in tiny increments. Gas is the most intuitive for simmering because the response is nearly instant.
Electric coil: Bring to a boil on medium-high, then reduce to 3 or 4 on a 1–10 scale. Remember, the coil holds residual heat, so your actual temperature drop will lag behind the dial change by a minute or two. If it’s still boiling 90 seconds after you turned it down, be patient — or briefly lift the pot.
Induction cooktop: Most induction stoves have a simmer button or setting around power level 3–4 (out of 10). Induction responds almost as fast as gas. If your model has temperature-based controls rather than power levels, just set it to 195°F and let the technology do its job. It’s genuinely the easiest cooktop for maintaining a precise simmer.
Glass-top radiant: Similar to electric coil but slightly more responsive. Dial setting 3–4, and watch the pot for the first few minutes. Glass-tops can also hold residual heat, so factor in a brief lag when adjusting.
No matter what stove you’re using, the visual test is always the most reliable. Gentle, small bubbles breaking the surface every second or two? That’s your simmer. Trust your eyes more than the dial numbers.
When Should You NOT Simmer?
Simmering is fantastic, but not every cooking task calls for it. Knowing when to use higher or lower heat is just as important.
Don’t simmer when searing meat. Searing requires high heat — 400°F+ at the pan surface — to create that brown, flavorful crust. If your pan is only at simmer temperature, the meat will just steam and turn grey. Get the pan screaming hot, sear your tri-tip or flank steak, and THEN reduce heat if the recipe calls for it.
Don’t simmer when boiling pasta. Pasta needs a full, rolling boil to cook properly. The vigorous water movement prevents the noodles from sticking together and ensures even cooking. If you simmer pasta, you’ll end up with a gummy, clumpy mess.
Don’t simmer when you need to reduce quickly. If a recipe says “reduce by half,” a low simmer will get you there eventually — but it might take an hour instead of 15 minutes. A rapid simmer or gentle boil is more appropriate for quick reductions.
Don’t simmer when deep frying. Oil temperatures for frying are typically 325°F–375°F, well above any simmer range. Using simmer-level heat for frying means greasy, soggy food that absorbs oil instead of crisping up.
FAQ
What does a simmer look like on the stove?
A simmer looks like small, gentle bubbles rising to the surface of the liquid every second or two. The surface of the liquid will have slight movement but won’t be churning or splashing. If you see large, aggressive bubbles breaking the surface rapidly, that’s a boil — turn the heat down. Think of a simmer as liquid that’s “whispering” rather than “shouting.”
Is simmer the same as low heat?
Not exactly. “Low heat” on most stoves is actually below a simmer — it’s the range where liquid stays hot but doesn’t produce visible bubbles. A simmer requires slightly more heat than the lowest setting on most stoves. On a 1–10 dial, low heat is 1–2, while a simmer is usually 3–4. The confusion comes from recipes that say “reduce to low and simmer,” which really means “set your stove to a point where the liquid gently bubbles” — and that point is usually medium-low, not the absolute lowest setting.
Can you simmer with a lid on?
Absolutely, and many recipes call for it. A lid traps steam and heat, which means you’ll need to use a slightly lower heat setting to maintain a simmer versus cooking uncovered. The key difference is that a covered simmer retains more liquid (less evaporation), while an uncovered simmer reduces the liquid and concentrates flavors. If a recipe doesn’t specify, a partially covered pot — lid slightly askew — is usually the safest default.
How do I keep a simmer from turning into a boil?
The best approach is to watch your pot during the first 5–10 minutes after reducing the heat. If bubbles start getting larger and more aggressive, turn the dial down just slightly. On electric stoves, you may need to lift the pot off the burner momentarily because the element retains heat. Also, using a heavy-bottomed pot helps regulate temperature more evenly, reducing those sudden spikes that push a simmer into a boil. A partially open lid can also help by releasing some steam and preventing heat buildup.
Does simmering kill bacteria in food?
Simmering temperatures (180°F–205°F) are well above the danger zone for foodborne bacteria. Most harmful bacteria — including Salmonella, E. coli, and Listeria — are destroyed at 165°F. So yes, maintaining a simmer for a sustained period effectively kills bacteria. This is actually one reason why slow-simmered stews and soups are considered very food-safe, as long as the internal temperature of all ingredients reaches at least 165°F. If you’re simmering pork sausage or any ground meat in a sauce, make sure the meat reaches safe internal temperature before you settle into a long simmer.
Your Simmer, Your Stove
Every stove is a little different, and that’s okay. The exact dial number matters less than what you see in the pot. Small, gentle bubbles? You’re simmering. Calm surface with just a hint of movement? Even better for delicate dishes.
The real skill isn’t memorizing a temperature — it’s learning how YOUR specific stove behaves with YOUR specific pots. Spend one afternoon doing the boil-then-reduce test with water, note where the dial lands for a gentle simmer, and you’ll have that knowledge forever.
Simmering is one of those foundational cooking techniques that touches almost everything you make — from a weeknight chicken soup to a weekend brisket braise. Get comfortable with it, trust the process, and let time and gentle heat do the heavy lifting. Your food will taste noticeably better for it.