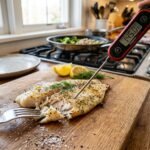
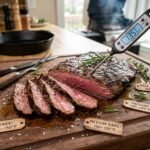
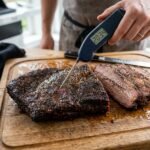
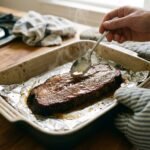
A single degree can separate a perfectly juicy tri-tip from a dry, tough disappointment. That’s not an exaggeration — it’s the reality of cooking this particular cut of beef. Tri-tip sits in a unique spot: it’s lean enough to dry out fast but flavorful enough to rival cuts twice its price. The catch? You need to nail the internal temperature for tri-tip when done, or you’re leaving all that potential on the cutting board.
Whether you’re grilling your first tri-tip this weekend or you’ve smoked a dozen of them, the question stays the same — what’s the exact temperature you should pull it at? And here’s where most people get tripped up: the “right” temperature depends on how you like your beef cooked. There’s no single magic number.
Let’s break this down so you never have to wonder (or worry) again.
What Is Tri-Tip And Why Does Temperature Matter So Much?
Tri-tip comes from the bottom sirloin subprimal cut of the cow. It’s a triangular-shaped muscle — that’s literally how it got its name. Most tri-tips weigh between 1.5 to 3 pounds, making them smaller than a brisket but bigger than a typical steak.
Here’s why temperature control is especially critical with tri-tip:
- It’s relatively lean. Unlike a well-marbled ribeye, tri-tip doesn’t have tons of intramuscular fat to keep it moist if you overcook it.
- It varies in thickness. One end is thicker than the other, so different parts of the same cut reach different temperatures at the same time.
- It has a strong grain pattern. This means slicing direction matters too, but we’ll get to that.
The bottom line? You can’t just “eyeball” tri-tip doneness. A reliable instant-read meat thermometer is your best friend here. If you’re unsure about how to read a meat thermometer, get comfortable with it before you start — it’ll make all the difference.
Internal Temperature For Tri-Tip At Every Doneness Level
Let’s get straight to the numbers. These are the pull temperatures (the temperature at which you remove the tri-tip from heat) and the final resting temperatures after carryover cooking does its thing.
Rare Tri-Tip
- Pull at: 120°F (49°C)
- After resting: 125°F (52°C)
- What it looks like: Cool, bright red center. Very soft to the touch.
- Who it’s for: People who love their beef as close to raw as possible with a nice sear on the outside.
⚠️ Quick Warning: Rare tri-tip isn’t for everyone. The USDA recommends a minimum of 145°F for whole cuts of beef for food safety. Eating rare beef carries some risk, especially for pregnant women, young children, elderly people, or anyone with a compromised immune system. If you’re curious about the safety debate around very rare beef, our piece on is blue steak safe covers the topic in depth.
Medium-Rare Tri-Tip (Most Popular)
- Pull at: 130°F (54°C)
- After resting: 135°F (57°C)
- What it looks like: Warm, pink-red center. Slightly firmer than rare but still very juicy.
- Who it’s for: This is the sweet spot for most beef lovers and what pitmasters typically aim for.
🔥 Pro Tip: Medium-rare is widely considered the ideal doneness for tri-tip. At this temperature, the collagen has softened just enough to make each bite tender, and the juices haven’t been squeezed out yet. If you’ve never cooked tri-tip before, aim here first.
Medium Tri-Tip
- Pull at: 140°F (60°C)
- After resting: 145°F (63°C)
- What it looks like: Pink center with a brownish-pink outer ring. Firm but not tough.
- Who it’s for: People who want some pink but don’t love the “juiciness” of medium-rare.
This is also the temperature the USDA officially recommends as the minimum safe internal temp for whole muscle beef cuts (with a 3-minute rest). So if food safety is your top priority, 145°F after resting is your target.
Medium-Well Tri-Tip
- Pull at: 150°F (66°C)
- After resting: 155°F (68°C)
- What it looks like: Slight hint of pink in the very center. Noticeably firmer texture.
- Who it’s for: People transitioning away from well-done who still want minimal pink.
Honest take: At medium-well, tri-tip starts losing its juiciness noticeably. Since this cut is already lean, you’re walking a fine line. If you prefer this doneness, consider marinating the tri-tip beforehand or wrapping it during the cook to retain moisture.
Well-Done Tri-Tip
- Pull at: 160°F (71°C)
- After resting: 165°F (74°C)
- What it looks like: Uniformly brown/gray throughout. No pink at all. Firm and dry.
- Who it’s for: People who genuinely don’t enjoy any pink in their beef.
Real talk: Most grill masters and chefs will advise against cooking tri-tip to well-done. The cut just doesn’t have enough fat to stay moist at this temperature. But preferences are personal, and if this is how you like it, go for it — just use a good sauce or au jus to add moisture back.
What Is Carryover Cooking And Why Should You Care?
This is the concept that separates good cooks from great ones. Carryover cooking means your tri-tip’s internal temperature keeps rising even after you pull it off the heat.
Here’s why it happens: the exterior of the meat is much hotter than the center. Once you remove it from the grill, oven, or smoker, that residual heat continues traveling inward, pushing the center temperature up.
How much does it rise?
For a typical tri-tip (2–3 pounds), expect the internal temp to climb 5–10°F during rest. The exact amount depends on:
- How thick the cut is
- How high the cooking temperature was
- How long you rest it
This is exactly why the “pull temperatures” listed above are lower than the final target. If you want a medium-rare tri-tip at 135°F, you pull it off at 130°F. Cook it TO 135°F on the grill, and you’ll end up closer to medium after resting.
Did You Know? Carryover cooking is more dramatic at high-heat cooking methods (like grilling at 450°F+) than low-and-slow methods (like smoking at 225°F). If you’re smoking your tri-tip, the carryover might only be 3–5°F.
How To Check Tri-Tip Temperature Correctly
Getting an accurate reading isn’t just about having a thermometer — it’s about where and how you insert it.
Where To Probe
- Insert the thermometer probe into the thickest part of the tri-tip.
- Aim for the geometric center — not near the surface and not touching the bottom.
- Avoid the thinner tapered end; it’ll always read higher than the thickest section.
- Don’t let the probe touch bone (though tri-tip is typically boneless) or the grill grate.
When To Start Checking
A common mistake: stabbing the meat every five minutes from the start. Each time you poke a hole, you lose a tiny bit of juice. Here’s a better approach:
- Know your estimated cook time. A 2-pound tri-tip grilled at medium-high heat takes roughly 20–30 minutes total. Smoked at 225°F, it might take 2–3 hours.
- Start checking temperature when you estimate you’re about 70% through the cook.
- Check every 5 minutes from that point on.
If you want even more accuracy without constantly opening the grill, consider a leave-in probe thermometer with a digital display. You set your target temp, and it alerts you when you hit it. No guessing, no repeated poking.
For a deeper understanding of doneness levels across different beef cuts, our steak doneness guide has you covered.
Best Methods To Cook Tri-Tip (And Temperature Tips For Each)
The cooking method you choose affects how fast the temperature rises and how much carryover to expect. Let’s look at the most popular approaches.
Grilling Tri-Tip
This is the classic California Santa Maria style. You’re working with direct and indirect heat on a gas or charcoal grill.
- Grill temp: 400–450°F for searing, then move to indirect at 300–350°F.
- Sear first for 5–7 minutes per side over direct heat.
- Move to indirect heat and cook until internal temp hits your pull target.
- Carryover: Expect 7–10°F of rise.
Pro Tip: The two-zone setup is key. Sear over the hot zone, then slide the tri-tip to the cooler zone to finish gently. This gives you a beautiful crust without blowing past your target temperature.
Smoking Tri-Tip
Low and slow brings out incredible smoky flavor, and tri-tip absorbs smoke beautifully because of its size.
- Smoker temp: 225–250°F
- Wood choice: Oak is traditional for Santa Maria style. Hickory works great too. If you’re debating between wood types, check out this comparison of hickory vs mesquite to find the right flavor profile.
- Cook time: 1.5–3 hours depending on size.
- Carryover: Only about 3–5°F at these low temps.
- Optional sear: Many pitmasters reverse-sear by smoking first, then finishing over high heat for a crust.
Oven-Roasting Tri-Tip
No grill? No problem. An oven handles tri-tip beautifully.
- Oven temp: 425°F for the initial sear (or sear in a cast-iron skillet on the stove first), then reduce to 350°F.
- Cook time: Roughly 25–35 minutes total for a 2-pound tri-tip.
- Carryover: About 5–8°F.
- Tip: Use a cast iron skillet — go from stovetop sear straight into the oven. One pan, less cleanup.
Sous Vide Tri-Tip
This is the most precise method. You set the exact temperature you want, and the water bath holds it there.
- Set water bath to your desired final temp (e.g., 135°F for medium-rare).
- Cook time: 2–4 hours.
- Carryover: Essentially zero — the meat is already at your target.
- Finish with a sear: Pat the tri-tip dry and sear in a screaming-hot cast iron skillet for 60–90 seconds per side.
Sous vide is basically foolproof for hitting your target temperature. The trade-off? You don’t get a smoke ring or that live-fire flavor without a finishing step.
The Rest Period: Don’t Skip This
You’ve pulled the tri-tip at the perfect temperature. Now comes the hardest part — waiting.
Rest the tri-tip for 10–15 minutes before slicing. Here’s what happens during that time:
- The internal temperature equalizes (carryover cooking finishes).
- The muscle fibers relax, allowing them to reabsorb juices that moved toward the surface during cooking.
- The meat firms up slightly, making it easier to slice cleanly.
If you cut into the tri-tip immediately, you’ll see a pool of juice flood the cutting board. That’s moisture that should’ve stayed in the meat.
How to rest properly:
- Place the tri-tip on a cutting board.
- Tent loosely with foil — don’t wrap it tight or you’ll steam the crust and lose that sear.
- Resist the urge to peek. Set a timer if you need to.
How To Slice Tri-Tip (It Affects Perceived Tenderness)
Even at the perfect internal temperature, slicing tri-tip wrong can make it seem tough and chewy. Here’s the thing about tri-tip that trips people up: the grain direction changes about halfway through the cut.
Step-by-Step Slicing
- Find the grain. Look at the lines running through the meat — those are muscle fibers.
- Always slice against the grain. This means your knife cuts perpendicular to those lines.
- The tricky part: Tri-tip has two distinct grain directions. Cut the roast roughly in half (across the middle), then slice each half against its own grain direction.
- Slice thin — about ¼ inch thick. Thinner slices feel more tender.
If you skip this step and slice with the grain, every bite will feel stringy — even if the internal temperature was spot-on.
For another cut where slicing technique makes or breaks the result, check out our guide on how to slice brisket.
Common Myths About Tri-Tip Temperature
Let’s clear up some misconceptions that keep floating around grilling forums and backyard BBQ conversations.
Myth #1: “You Can Tell Doneness By Pressing The Meat”
The “poke test” — comparing the firmness of the meat to the flesh at the base of your thumb — is wildly unreliable. People’s hands vary. Meat density varies. A thermometer costs $15 and gives you a definitive answer. Don’t leave a $30+ cut of beef to guesswork.
Myth #2: “Pink Meat Means It’s Undercooked”
Not true. Color is affected by many factors: pH levels, myoglobin content, exposure to smoke (smoke rings!), and even how the animal was raised. A tri-tip can be perfectly safe at 145°F and still look quite pink. Likewise, a piece of meat cooked with certain marinades can turn brown before it’s actually done.
Temperature doesn’t lie. Color sometimes does.
Myth #3: “Searing Locks In Juices”
This one has been debunked by food scientists for decades, yet it persists. Searing creates a Maillard reaction — that beautiful, flavorful, caramelized crust. But it doesn’t create a moisture “seal.” The crust is porous. Searing is about flavor and texture, not juice retention. Proper resting is what keeps juices inside the meat.
Myth #4: “All Parts Of The Tri-Tip Should Be The Same Temperature”
Remember, tri-tip tapers from thick to thin. The thick end will naturally be rarer than the thin end. This is actually a feature, not a bug — it means you can serve different doneness levels from the same roast. Prefer medium? Take slices from the thin end. Want medium-rare? Go for the thick center.
Tri-Tip vs. Other Cuts: Temperature Comparison
Understanding how tri-tip’s target temps compare to other popular cuts can help if you’re managing a multi-meat cookout.
| Cut | Ideal Pull Temp (Med-Rare) | Key Difference |
|---|---|---|
| Tri-tip | 130°F | Lean; needs precise temp control |
| Ribeye steak | 130°F | More marbling = more forgiving |
| Flank steak | 130°F | Even leaner; slice super thin |
| Brisket | 195–205°F | Collagen breakdown needed; different game entirely |
| Pork chops | 140°F | Different protein; different rules |
Notice that tri-tip and flank steak share similar characteristics — both are lean and benefit from slicing against the grain. If you enjoy tri-tip, you might also want to explore flank steak done temperature for your next cook.
And brisket? Completely different ballgame. Brisket needs to reach 195–205°F because it requires collagen breakdown that only happens at much higher internal temps. Our guide on when to pull brisket explains that process in detail.
Quick Reference: Tri-Tip Temperature Cheat Sheet
Save this for your next cook:
- Rare: Pull at 120°F → Rests to 125°F
- Medium-Rare: Pull at 130°F → Rests to 135°F ⭐ (Recommended)
- Medium: Pull at 140°F → Rests to 145°F (USDA minimum)
- Medium-Well: Pull at 150°F → Rests to 155°F
- Well-Done: Pull at 160°F → Rests to 165°F
Always rest 10–15 minutes. Always use a thermometer. Always slice against the grain.
Troubleshooting: What If You Missed Your Target Temp?
It happens to everyone. You got distracted, the grill ran hotter than expected, or you just lost track of time.
Overcooked Tri-Tip
If you blew past your target by 10°F or more:
- Slice it extra thin. Thinner slices mask some of the dryness.
- Serve with a sauce or au jus. Chimichurri, a red wine reduction, or even a simple beef broth with garlic can add back moisture and flavor.
- Chop it for tacos or sandwiches. Adding toppings and sauces makes overcooked tri-tip much more enjoyable than eating it plain.
Undercooked Tri-Tip
If you sliced into the tri-tip and it’s too rare for your liking:
- Individual slices can go back on the grill or into a hot skillet for 30–60 seconds per side.
- Alternatively, place slices on a sheet pan under the broiler for 1–2 minutes.
- Don’t try to put the whole roast back on heat once you’ve sliced it — it’ll dry out unevenly.
Seasoning And Prep Tips That Affect Temperature Performance
Your seasoning and prep choices don’t change the target temperature, but they influence how the meat behaves during the cook.
Salt Early
Dry-brining (salting the tri-tip and letting it sit uncovered in the fridge for 4–24 hours) does two things:
- Draws moisture to the surface, which then gets reabsorbed along with the salt, seasoning the meat deeper.
- Creates a drier surface, which means a better sear and crust.
A well-salted, dry-brined tri-tip also seems to retain moisture better during cooking, giving you a wider margin of error with your target temperature.
Bring To Room Temp (Sort Of)
You’ve probably heard “let meat come to room temperature before cooking.” The truth is that a 2-pound tri-tip sitting on the counter for 30 minutes barely changes its internal temp — maybe 5°F. It’s not going to make or break your cook.
What it DOES help with: evening out the surface moisture so you get a better sear right away instead of steaming the meat for the first few minutes.
Choose The Right Thermometer
Not all thermometers are equal:
- Instant-read digital thermometers (like the ThermoWorks Thermapen) give readings in 2–3 seconds. Ideal for spot-checking.
- Leave-in probe thermometers sit in the meat throughout the cook and display the temp on an external unit. Great for smoking or oven-roasting when you don’t want to keep opening the lid.
- Avoid dial/analog thermometers — they’re slow, often inaccurate, and require frequent calibration.
FAQ Section
What is the best internal temperature for tri-tip?
Most pitmasters and chefs agree that 130–135°F (medium-rare) is the best internal temperature for tri-tip. At this range, the meat stays juicy, tender, and full of beefy flavor. Since tri-tip is a lean cut, cooking it past medium (145°F) can cause it to dry out quickly. Pull it at 130°F and let carryover cooking bring it to 135°F during the rest period.
How long should you rest tri-tip after cooking?
Rest tri-tip for 10 to 15 minutes after pulling it off the heat. This lets the internal temperature equalize through carryover cooking and allows the muscle fibers to relax and reabsorb juices. Tent it loosely with aluminum foil during this time — don’t wrap it tightly, or the steam will soften your crust.
Can you eat tri-tip at 130°F — is it safe?
The USDA recommends a minimum internal temperature of 145°F with a 3-minute rest for whole cuts of beef. At 130–135°F (medium-rare), there is a slightly higher risk compared to the USDA guideline, but many restaurants regularly serve beef at this temperature. Healthy adults generally handle it well. If you have concerns about food safety due to age, pregnancy, or immune conditions, sticking to 145°F is the safer choice.
Why is my tri-tip tough even at the right temperature?
Two likely reasons. First, you may have sliced with the grain instead of against it. Tri-tip has two grain directions, and cutting incorrectly makes even perfectly cooked meat feel chewy. Second, the tri-tip may not have rested long enough. Cutting too early lets juices escape, leaving the meat drier and tougher. Always rest at least 10 minutes and slice against the grain.
Is tri-tip the same as brisket?
No, they’re completely different cuts. Tri-tip comes from the bottom sirloin (rear of the cow), while brisket comes from the chest area. Brisket is heavily marbled with connective tissue that needs to break down at very high internal temps (195–205°F). Tri-tip is lean and best served at steak-like temperatures (130–145°F). They require totally different cooking approaches and target temperatures.
Your Next Tri-Tip Is Going To Be The Best One Yet
Here’s the beautiful thing about cooking tri-tip: once you commit to using a thermometer and respecting the pull temperatures, the guesswork disappears. You don’t need years of grilling experience or an expensive setup. You need a good thermometer, a little patience during the rest period, and a sharp knife to slice against the grain.
Start with 130°F pull for medium-rare if you’re unsure where to begin. It’s forgiving, it’s juicy, and it’s what turns first-timers into tri-tip fanatics.
Grab that thermometer, fire up whatever heat source you’ve got, and trust the numbers. Your taste buds will handle the rest.