According to the CDC, roughly 48 million Americans get sick from foodborne illnesses every year — and a huge chunk of those cases come down to one simple mistake: undercooked meat. The fix? A $10 meat thermometer and knowing how to actually read it.
Sounds basic, right? But you’d be surprised how many people own a meat thermometer and still aren’t sure what those numbers and lines on the dial mean. Or they stick the probe in the wrong spot and get a reading that’s completely off. The result? Either overcooked, dry chicken or — worse — meat that looks done on the outside but isn’t safe on the inside.
This guide breaks down everything you need to know about reading a meat thermometer properly. Whether you’ve got a classic analog dial, a digital instant-read, or a leave-in probe, you’ll walk away knowing exactly how to use it and what those numbers should look like for every type of meat.
Why Your Meat Thermometer Matters More Than You Think
Let’s get one thing straight — cutting into your steak to “check the color” isn’t a reliable way to know if it’s done. Color can fool you. A burger can look brown and still be undercooked inside. And pork can have a pink tinge even when it’s perfectly safe to eat. If you’ve ever wondered whether pink pork tenderloin is safe, you already know color alone doesn’t tell the full story.
A meat thermometer removes all the guesswork. It gives you a precise internal temperature reading so you know — not guess, but know — that your food is both safe and cooked exactly how you like it.
The USDA sets specific minimum internal temperatures for different proteins. Hit that number, and you’ve killed harmful bacteria like Salmonella, E. coli, and Listeria. Miss it, and you’re rolling the dice.
Quick fact: The USDA updated its pork cooking guidelines back in 2011, lowering the recommended temperature from 160°F to 145°F (with a 3-minute rest). If you’re still cooking pork to 160°F because that’s what your mom did, you’re drying out perfectly good chops for no reason.
Types Of Meat Thermometers And How Each One Works
Before you can read a meat thermometer, you need to understand which type you’re working with. Each one displays temperature differently, and each has its own quirks.
Analog (Dial) Thermometers
These are the old-school ones — a metal probe connected to a round dial face. The needle moves around the dial as it senses heat, pointing to the temperature on the numbered scale.
The dial usually shows temperature in both Fahrenheit and Celsius. The numbers go up in increments of 2, 5, or 10 degrees depending on the model. Small lines between the numbers represent individual degrees or two-degree increments.
Here’s the thing about analog thermometers: they’re slow. You might wait 15 to 30 seconds for the needle to settle and give you a stable reading. Don’t pull it out too early or you’ll get an inaccurate number.
Pro Tip: Most analog thermometers have a small nut on the back of the dial. If your thermometer seems off, you can recalibrate it using the ice water method (more on that below). Just dip it in ice water, and if it doesn’t read 32°F (0°C), turn that nut with pliers until it does.
Digital Instant-Read Thermometers
These are the most popular choice for home cooks today, and for good reason. You stick the probe in, and within 2 to 5 seconds, you get a precise digital reading on the screen. No guessing where the needle is pointing. No squinting at tiny lines.
Brands like ThermoWorks Thermapen, ThermoPro, and Lavatools Javelin are all popular options in 2025. Most display temperature to one decimal point, so you’ll see readings like 162.4°F instead of just “somewhere around 160.”
The sensor on a digital instant-read sits right at the very tip of the probe — usually in the last half-inch. This is important to remember because it affects where you place the probe (we’ll cover that in detail shortly).
Leave-In Probe Thermometers
These stay in your meat throughout the cooking process. You insert the probe before putting the meat in the oven, smoker, or grill. A wire connects to an external display unit that sits outside the cooking chamber, showing you real-time temperature updates.
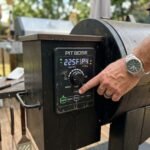
Some modern versions — like the MEATER and ThermoWorks Smoke — are wireless and connect to your phone via Bluetooth or Wi-Fi. You can set target temperature alerts so your phone buzzes when your brisket hits the perfect internal temp. If you’ve ever struggled with knowing when to pull brisket off the smoker, a leave-in probe basically solves that problem for you.
Oven-Safe Analog Thermometers
These look like analog dial thermometers but are designed to stay in the meat while it cooks. The dial sticks out of the oven, and you read it by peeking through the oven window or quickly opening the door. They’re less precise than digital options but still get the job done.
How To Read The Numbers On A Meat Thermometer
Alright, this is the core stuff. Let’s break it down by thermometer type so there’s zero confusion.
Reading An Analog Dial Thermometer
Look at the dial face. You’ll see numbers printed around the circle, usually ranging from about 120°F to 220°F (or 50°C to 100°C). Between those printed numbers, you’ll notice small tick marks.
Here’s how to figure out what each tick mark represents: count the number of tick marks between two printed numbers. If there are 4 tick marks between 140 and 160, each tick equals 5 degrees. If there are 9 tick marks between 140 and 160, each tick equals 2 degrees.
Read the temperature by looking at where the needle points. If the needle sits directly on a line, that’s your temperature. If it’s between two lines, estimate the value. For example, if it’s halfway between 150°F and 155°F, you’re at roughly 152°F to 153°F.
Warning: Don’t read the dial at an angle. Look at it straight on — otherwise, parallax error can make you misread the needle’s position by several degrees. That might not sound like much, but the difference between 155°F and 160°F on a chicken breast is the difference between a food safety gamble and a safe meal.
Reading A Digital Thermometer
This one’s straightforward. The screen displays the exact number. But a few things to keep in mind.
Make sure you know whether it’s showing Fahrenheit or Celsius. Most models have an °F/°C toggle button. The USDA guidelines most Americans follow are in Fahrenheit, so if your thermometer is accidentally set to Celsius and you’re aiming for “165” — you’d be cooking your chicken to 329°F, which is way past done.
Wait for the number to stabilize. Even though digital thermometers are fast, the number might fluctuate for a second or two before settling. The final, stable number is your reading.
Some digital models also have a “hold” button that locks the reading in place after you remove the probe. This is helpful when you’re pulling the probe out of a hot grill and don’t want to lose the number.
Where To Insert The Thermometer (This Is Where Most People Mess Up)
You could have the most expensive thermometer on the market, but if you stick the probe in the wrong spot, your reading will be meaningless. Placement is everything.
The golden rule is simple: always measure the thickest part of the meat, and avoid touching bone, fat, or the cooking surface.
Bone conducts heat differently than muscle tissue. If your probe touches bone, you’ll get a higher reading than the actual meat temperature, and you might pull your food too early. Fat pockets also give inaccurate readings because fat heats up faster than lean meat.
For Whole Poultry (Chicken, Turkey)
Insert the probe into the innermost part of the thigh, right between the drumstick and the breast. Aim for the deepest part of the thigh meat without hitting the bone. This is the last area to reach safe temperature, so if the thigh reads 165°F, you’re good everywhere.
For Steaks And Chops
Push the probe in from the side, going horizontally toward the center. If you go in from the top, you might push the probe too deep and hit the pan underneath — giving you the pan’s temperature, not the steak’s. If you’re trying to nail a specific steak doneness level, this side-insertion method gives you the most accurate center reading.
For Ground Meat (Burgers, Meatloaf)
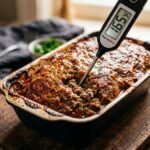
Ground meat doesn’t have a “thickest part” in the traditional sense, but you still want the center. For burgers, insert from the side into the middle. For meatloaf, go straight into the geometric center. If you’re making meatloaf, knowing the exact meatloaf internal temperature target will help you avoid both undercooking and drying it out.
For Large Cuts (Brisket, Pork Shoulder, Roasts)
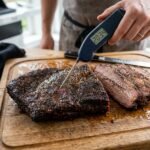
These big boys have multiple muscle groups, so test in more than one spot. For brisket, the probe should go into the thickest part of the flat — and if you’re not sure exactly where to probe brisket, there’s a specific technique to make sure you’re hitting the right muscle.
For pork shoulder, insert into the deepest section of the meat while keeping clear of the bone. When you’re smoking pork shoulder for pulled pork, you’re aiming for an internal temp around 195°F–205°F — much higher than the safety minimum — because that’s where the connective tissues break down and the meat gets tender enough to shred.
Safe Internal Temperatures You Should Know
Your thermometer is only useful if you know what number you’re shooting for. Here’s a quick reference based on USDA recommendations (updated as of 2025):
Poultry (chicken, turkey, duck): 165°F (74°C) — this applies to all parts: breasts, thighs, wings, and ground poultry. Some pitmasters argue that chicken thighs taste better at 175°F–180°F because of the extra connective tissue, and they’re right — 165°F is the safety minimum, not necessarily the flavor optimum.
Ground meats (beef, pork, lamb): 160°F (71°C). Since grinding mixes surface bacteria throughout the meat, ground products need a higher temp than whole cuts. This applies to hamburgers too — even if you like your steak rare, your burger needs to hit 160°F.
Whole cuts of beef, pork, lamb, and veal: 145°F (63°C) with a 3-minute rest. This rest period is critical — the temperature continues to rise slightly after you remove the meat from heat, and those three minutes allow the residual heat to kill any remaining bacteria.
Fish and seafood: 145°F (63°C). Whether it’s halibut, tilapia, or cod, the target stays the same.
Pork sausage: 160°F (71°C). Since sausage is essentially ground meat with seasonings, it follows the ground meat rules. If you’ve ever asked yourself “when is pork sausage fully cooked,” that’s your answer — 160°F, no exceptions.
Understanding Carryover Cooking (And Why You Should Pull Early)
Here’s something that separates an okay cook from a really good one: understanding carryover cooking.
When you pull a piece of meat off the heat, it doesn’t stop cooking immediately. The exterior is hotter than the center, and that residual heat keeps pushing inward, raising the internal temperature by anywhere from 3°F to 10°F depending on the size of the cut and how high the cooking temperature was.
A thick ribeye grilled over high heat might climb 8°F–10°F after resting. A thin chicken breast in the oven might only rise 2°F–3°F.
So if your target is 145°F for a medium steak, pull it off the grill around 138°F–140°F and let it rest. By the time you slice into it, you’ll be right where you want to be.
This is especially important for big cuts. If you’re smoking a tri-tip and you wait until the thermometer reads exactly 135°F for medium-rare, you’ll end up with medium after resting. Pull it at 128°F–130°F instead.
Pro Tip: Always rest your meat on a cutting board — not on the hot grill grate or in the hot pan. You want it to coast gently, not keep aggressively cooking from contact heat.
How To Calibrate Your Meat Thermometer
If your thermometer is off by even 5 degrees, your perfectly planned cook is going to miss the mark. Calibration checks should happen at least every few months — or anytime you drop the thermometer.
The Ice Water Test
Fill a glass with ice, then add cold water until it’s full. Stir it around for about 30 seconds so the temperature stabilizes. Insert your thermometer probe into the center of the water, making sure the tip doesn’t touch the ice directly.
It should read 32°F (0°C). If your digital thermometer has a calibration button, press it now. If it’s an analog model, use the nut behind the dial to adjust the needle to 32°F.
The Boiling Water Test
Bring a pot of water to a rolling boil. Insert the thermometer. It should read 212°F (100°C) at sea level. If you live at higher altitudes, the boiling point drops — roughly 2°F less per 1,000 feet of elevation. So in Denver (5,280 feet), boiling water reads around 202°F, and that’s perfectly normal.
Did you know? Some cheap thermometers can drift by as much as 10°F–15°F over time. If your food keeps coming out undercooked or overdone even when you’re following the right temperatures, a drifted thermometer is usually the culprit.
Common Mistakes That Give You Bad Readings
Even experienced cooks make these errors. Knowing them will save you a lot of frustration.
Checking too early or too frequently. Every time you open the oven or lift the grill lid to check temperature, you’re releasing heat and adding to your total cook time. If you’re using a leave-in probe, you don’t need to open anything — just watch the display. If you’re using an instant-read, resist the urge to check every five minutes. Have patience.
Not inserting deep enough. The sensor on most digital probes is in the last half-inch of the tip. If you barely poke the surface, you’re reading the outer layer — which is always hotter than the center. Push the probe in until it reaches the middle of the thickest section.
Inserting too deep. On the flip side, if you push the probe all the way through a thin piece of meat, the tip pokes out the other side and reads the air temperature (or the pan temperature). For thin cuts like flank steak, go in from the side so you can position the probe tip right in the center.
Not accounting for different zones. A large roast or a whole turkey doesn’t cook evenly everywhere. The parts closest to the heat source will be hotter. Always check multiple spots and go by the lowest reading — that’s the part that needs more time.
Reading the thermometer while it’s still fluctuating. Give it a few seconds to settle. The first number you see isn’t always the final number.
Caring For Your Meat Thermometer
A clean, well-maintained thermometer lasts longer and stays accurate. After each use, wash the probe with hot soapy water. Don’t submerge the entire unit — especially analog models and digital models that aren’t waterproof. Wipe the probe with a sanitizing solution if you’ve been checking raw poultry.
Store it in a protective case or sleeve. Probes can bend if they rattle around in a drawer, and a bent probe leads to poor insertion and inaccurate readings.
Replace batteries proactively. A dying battery in a digital thermometer can cause erratic or slow readings that you might not even notice. If the display seems dim or the readings are sluggish, swap the battery before your next cook.
FAQ
What’s the difference between an instant-read and a leave-in thermometer?
An instant-read thermometer gives you a quick temperature check — you insert it, read the number, and pull it out. A leave-in thermometer stays in the meat throughout the entire cooking process and continuously monitors the temperature. Instant-reads are great for quick checks on steaks and burgers. Leave-in probes are ideal for long, slow cooks like brisket or roasts where you need to track temperature over hours without opening the cooker.
Can I use a meat thermometer for liquids like oil or candy?
Some meat thermometers can handle the higher temperatures needed for deep frying (350°F–375°F) or candy making (up to 300°F+), but not all of them. Check your thermometer’s temperature range before dipping it into hot oil. Candy thermometers and deep-fry thermometers are specifically designed for those jobs and usually clip to the side of the pot, which most meat thermometers can’t do.
How do I know if my meat thermometer is accurate?
Use the ice water test. Fill a glass with ice and cold water, stir for 30 seconds, and insert the probe. If it reads 32°F (0°C), you’re good. If it’s off by more than 2 degrees, calibrate it (if your model allows) or replace it. Doing this check every couple of months keeps you confident in your readings.
Why does my thermometer show different temperatures in different spots of the same piece of meat?
Because meat doesn’t cook uniformly. Areas closer to bone heat up differently than pure muscle. Thinner sections cook faster than thick ones. The side facing the heat source is always warmer. This is exactly why you should check multiple spots and base your decision on the coolest reading — that’s the area that needs the most time.
Do I need to let meat rest before checking the temperature?
No — you check the temperature before you decide to pull the meat off the heat. The resting period comes after you’ve removed it. During rest, carryover cooking will push the internal temp up a few more degrees. So you actually want to pull meat off the heat a few degrees below your final target and let the rest period finish the job.
Your Thermometer Is Your Best Kitchen Tool — Use It
A meat thermometer isn’t a gadget for professionals or BBQ obsessives. It’s the single most practical tool you can own if you cook any kind of protein at home. It takes the guesswork out of food safety, prevents overcooking, and gives you consistent results every single time.
If you don’t already own one, grab a decent digital instant-read — you can find reliable ones for under $20. If you already have one collecting dust in a drawer, pull it out, calibrate it using the ice water method, and start using it on your next cook.
Your steak will thank you. Your chicken will thank you. And your stomach will definitely thank you.