A single undercooked hamburger sent over 700 people to the hospital during the infamous 1993 Jack in the Box E. coli outbreak. That’s not ancient history — it’s a reminder that ground beef plays by different rules than a whole steak. And the only reliable way to know your burger is safe? Checking the internal temperature of a hamburger with a good meat thermometer.
Here’s the thing — most backyard grillers still judge doneness by pressing the patty with a spatula or cutting it open. Both methods are unreliable, and cutting lets all those beautiful juices run out. Whether you’re grilling for your family on a Sunday afternoon or running a food truck, knowing the right internal temp isn’t just about food safety. It’s also the difference between a dry hockey puck and a burger that makes people close their eyes while chewing.
This guide breaks down everything — the USDA-recommended temperatures, how doneness levels actually work with ground beef, why hamburgers are different from steaks, and how to get an accurate reading every single time.
Why the Internal Temperature of a Hamburger Matters More Than You Think
Let’s talk about why ground beef gets special treatment compared to a whole cut like a ribeye or tri-tip.
A steak is a solid muscle. Bacteria like E. coli and Salmonella sit on the surface. When you sear the outside, you kill them. That’s why you can safely eat a medium-rare steak — the inside was never exposed to contamination.
Ground beef? Totally different story. The grinding process mixes the surface bacteria throughout the entire meat. Every part of that patty — outside, middle, center — could potentially harbor harmful bacteria. That’s exactly why the internal temperature of a hamburger becomes a non-negotiable safety checkpoint.
And this isn’t just about being cautious. The CDC estimates that ground beef is one of the top sources of E. coli O157:H7 infections in the United States. Children under 5, elderly adults, pregnant women, and anyone with a weakened immune system face the highest risk from undercooked burgers.
Quick fact: Color alone can’t tell you if a burger is done. USDA research shows that 1 in 4 burgers turns brown before reaching a safe temperature, while some stay pink even at 160°F. Your eyes can fool you. A thermometer won’t.
The USDA Recommended Internal Temperature for Hamburgers
The USDA recommends 160°F (71°C) as the safe minimum internal temperature for all ground beef, including hamburgers. At this temperature, harmful bacteria like E. coli O157:H7, Salmonella, and Listeria are destroyed almost instantly.
This isn’t a suggestion — it’s the official food safety standard backed by decades of microbiological research. For ground poultry burgers (like turkey burgers), the target is even higher at 165°F (74°C).
Now, does 160°F mean your burger has to be dry and flavorless? Absolutely not. We’ll get to techniques that keep a well-done burger juicy later in this article. But let’s first understand what happens at different temperature ranges.
Hamburger Doneness Levels and Their Internal Temperatures
Unlike a steak doneness guide where you pick your preferred level freely, hamburger doneness comes with a safety caveat. Here’s what each level looks like on the inside:
Rare (120–125°F / 49–52°C) — The center is cool and bright red. The patty feels very soft. This is NOT considered safe for ground beef by the USDA or any major food safety authority. Some high-end restaurants serve rare burgers using whole-muscle cuts ground in-house and served immediately, but that’s a controlled environment most home cooks can’t replicate.
Medium Rare (130–135°F / 54–57°C) — Warm red center with a pinkish outer ring. Still below the safety threshold for ground beef. Many burger enthusiasts prefer this level, but it carries a real risk with standard commercially ground beef.
Medium (140–145°F / 60–63°C) — A warm pink center that’s firmer to the touch. Closer to safe territory but still not at the USDA benchmark. Some states allow restaurants to serve burgers at this temperature with consumer advisory warnings on the menu.
Medium Well (150–155°F / 66–68°C) — Slightly pink center, mostly gray-brown throughout. Almost there but still a few degrees short of guaranteed safety.
Well Done (160°F+ / 71°C+) — No pink remaining. This is the USDA-safe temperature where all harmful bacteria are eliminated. The texture is firmer, but with the right techniques, it doesn’t have to be dry.
Pro Tip: If you’re cooking for kids, pregnant women, or elderly family members, always stick to 160°F minimum. No exceptions. The risk-reward calculation just isn’t worth it with vulnerable groups.
Why Hamburgers and Steaks Have Different Safety Rules
This question comes up constantly, and it’s a fair one. You can eat a steak at 130°F but need a burger at 160°F? That feels contradictory until you understand the science.
Think of it this way. A whole steak is like a sealed package — bacteria only live on the outside surface. A quick sear at 400°F+ kills everything on the exterior within seconds. The sterile interior stays untouched.
Now picture grinding that steak. You’re taking the contaminated surface and folding it into the middle, mixing it through every layer. That sealed package is now open everywhere. Bacteria that were safely on the outside are suddenly buried deep in the center of your patty where a surface sear can’t reach them.
That’s exactly why a burger needs higher internal temps — the heat has to penetrate all the way through to kill bacteria that could be hiding anywhere inside the grind.
This same principle applies to meatloaf and pork sausage too. Any time meat is ground, mixed, or processed, the safe internal temperature goes up because you can no longer rely on surface cooking alone.
How to Check the Internal Temperature of a Hamburger Accurately
Owning a meat thermometer is step one. Using it correctly is step two — and most people get step two wrong.
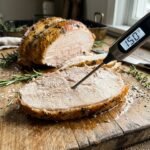
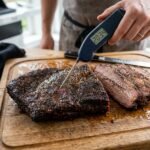
Use an instant-read digital thermometer. Dial thermometers are slow and less precise. A good digital instant-read gives you a reading within 2–3 seconds. You can find reliable ones for under $15, and they’ll change your cooking game overnight. If you’re unsure how to read a meat thermometer properly, it’s worth learning the basics before your next cookout.
Insert from the side, not the top. This is the most common mistake. A burger patty is usually ¾ to 1 inch thick. If you poke straight down from the top, your thermometer probe might go right through the patty and touch the hot grill grate — giving you a false high reading. Instead, slide the probe horizontally into the side of the burger, pushing it toward the center.
Find the true center. The thickest part of the patty is always the last spot to reach temperature. Aim for the geometric center. If your patty is uneven, check the thickest section specifically.
Check every patty individually. Don’t assume all your burgers are at the same temp just because they went on the grill at the same time. Thickness, fat content, grill hot spots, and how cold the patty was before cooking all affect how fast each burger heats up.
Wait for the reading to stabilize. Some cheaper thermometers fluctuate for a few seconds before settling. Give it a moment. And don’t pull it out while it’s still climbing — you’ll get an inaccurate low reading.
⚠️ Warning: Never rely on visual cues alone. As mentioned earlier, color is unreliable for ground beef. A brown burger might be undercooked, and a pink burger might be perfectly safe. Temperature is the only trustworthy indicator.
What About Carryover Cooking? Does It Affect Burgers?
If you’ve ever cooked a tri-tip or a brisket, you know about carryover cooking — the temperature keeps rising after you pull the meat off the heat. A thick brisket can climb 5–10°F while resting.
Burgers are a different animal. They’re thin, have a high surface-area-to-volume ratio, and cool down quickly once removed from the grill. Carryover cooking in a typical ¾-inch patty is minimal — usually only about 2–3°F at most.
So what does this mean practically? If you’re targeting 160°F, you could pull your burger at 157–158°F and let it rest for 2–3 minutes. It’ll likely climb those last couple of degrees. But don’t rely on this too aggressively. With food safety, it’s better to overshoot by a degree or two than to undershoot.
Thicker patties — say, the big ½-pound pub-style burgers that are 1.5 inches thick — will see a bit more carryover, closer to 3–5°F. For these, pulling at 155°F and resting is reasonable.
How to Keep a 160°F Burger Juicy (Yes, It’s Possible)
This is the real concern, right? “If I cook my burger to 160°F, won’t it be dry?” Honestly, it can be — but only if you’re not using a few simple tricks that make all the difference.
Choose the right fat content. Lean ground beef (90/10 or 93/7) dries out faster at higher temperatures because there’s less fat to compensate for moisture loss. Go with 80/20 ground chuck — it’s the sweet spot for juicy, flavorful burgers that hold up well at 160°F. The extra fat keeps things moist even when fully cooked. If you’re curious about ground sirloin vs ground beef, the fat content difference has a direct impact on how your burger turns out.
Don’t overwork the meat. Every time you squeeze, press, and compact the ground beef while forming patties, you’re breaking down the protein structure and creating a denser, tougher texture. Gently form your patties with minimal handling. Think of it like building a sandcastle — firm enough to hold shape, light enough to stay tender.
Make a dimple in the center. Press your thumb into the middle of each patty to create a shallow indent. Burgers puff up in the center as they cook, and that dimple counteracts the swelling. You end up with a flat, evenly-cooked patty instead of a ball.
Don’t press with the spatula. This is probably the single most damaging habit in backyard grilling. Every time you press down on a cooking burger, you’re literally squeezing out the juices and fat that keep it moist. Place the patty on the grill, flip it once, and leave it alone.
Add moisture boosters. Mix a tablespoon of Worcestershire sauce, a splash of beef broth, or even a small amount of grated onion into the ground beef before forming patties. These additions release steam and moisture during cooking, keeping the inside from drying out even at well-done temperatures.
Rest the burger briefly. Even 2–3 minutes of resting after cooking allows the juices to redistribute. Put the patty on the bun, add your cheese on top (the residual heat will melt it), and let it sit. You’ll notice the difference in the first bite.
Cooking Methods and How They Affect Internal Temperature
Not all cooking methods heat a burger the same way. Your grill, your pan, and your oven all transfer heat differently, which affects how quickly (and evenly) the patty reaches the target temperature.
Grilling (Gas or Charcoal)
Grilling over direct heat at 400–450°F is the most popular method. High radiant and conductive heat sears the outside fast, which is great for flavor but can create a big temperature gap between the crust and the center. On a very hot grill, the outside might be charred while the inside is still at 120°F.
The fix? Use a two-zone setup. Sear over direct high heat for 2–3 minutes per side, then move the burger to indirect heat (the cooler side of the grill) to let the center catch up. This gives you a beautiful crust AND even internal cooking.
Pan/Griddle (Stovetop)
Cast iron skillets and flat-top griddles provide excellent even heat. You get maximum contact between the patty and the cooking surface, which means consistent browning and more predictable temperature climb. Medium-high heat works best — around 375–400°F on the surface.
Stovetop burgers often reach 160°F more evenly than grilled ones because the heat transfer is more consistent. If you’re cooking on a stovetop, you might also want to understand how to manage your simmer temperature for any sauces or toppings you’re preparing alongside.
Oven-Baked
Baking burgers at 375°F in the oven gives you the most uniform cooking. It’s slower, so the temperature gradient from outside to inside is smaller. Great for meal-prepping a batch of burgers. The tradeoff? You lose the Maillard reaction crust that direct heat provides, unless you sear the patties on the stovetop first and then finish in the oven.
Smoked Burgers
Smoking burgers at 225–250°F is gaining popularity, and for good reason — you get incredible flavor. But low-and-slow cooking means the patty spends more time in the “danger zone” (40–140°F), so reaching 160°F internal is absolutely critical. Don’t pull smoked burgers early.
Special Situations: Stuffed Burgers, Frozen Patties, and Blended Burgers
Stuffed / Juicy Lucy Burgers
If you’re making stuffed burgers (cheese, jalapeños, or other fillings inside the patty), the internal temperature still needs to reach 160°F — but you need to measure the meat temperature, not the filling. Cheese melts well below 160°F, so a melted center doesn’t mean the beef around it is cooked through. Insert your thermometer into the meat portion, away from the filling.
Also, stuffed burgers are thicker by nature, usually 1.5–2 inches. They take longer to cook and benefit from lower, indirect heat to avoid burning the outside before the center is done.
Frozen Patties
Cooking burgers from frozen is totally fine — you just need to add time. A frozen patty takes roughly 50% longer to cook than a thawed one. The temperature target doesn’t change: still 160°F internal.
Start frozen patties over medium heat rather than high. High heat chars the frozen exterior while the inside stays icy. Medium heat gives the center time to thaw and cook through.
Blended Burgers (Beef + Mushroom, Beef + Pork)
Blended burgers that mix ground beef with mushrooms, vegetables, or other ground meats follow the highest safe temp requirement of any ingredient. Beef-pork blends? Go to 160°F (safe for both). Beef-turkey blends? You’ll want 165°F to account for the poultry component.
Ground Beef Temperature for Kids and High-Risk Groups
This deserves its own section because the stakes are genuinely higher for certain people.
Children under 5 years old have immature immune systems. E. coli infections can lead to hemolytic uremic syndrome (HUS) in young kids, which causes kidney failure. It’s rare, but it’s real and it’s serious.
Pregnant women face risks from Listeria and Toxoplasma, both of which can cause miscarriage or birth defects. Elderly adults and immunocompromised individuals (cancer patients, transplant recipients, people on certain medications) are also at elevated risk.
For all these groups, the rule is simple: always cook hamburgers to 160°F, no exceptions. Don’t serve them rare or medium-rare ground beef, period. And honestly, with the right fat content and cooking technique, a well-done burger can taste fantastic — so there’s really no sacrifice here.
⚠️ Disclaimer: This article provides general food safety information based on USDA and CDC guidelines. For specific medical or dietary concerns related to food safety, consult your doctor or a licensed dietitian.
Common Temperature Mistakes That Ruin Burgers
Checking too early. If you keep poking the burger with a thermometer every 30 seconds, you’re creating holes that let juice escape. Check once midway through cooking to gauge progress, and then once more near the end. Two checks per patty is plenty.
Relying on cooking time instead of temperature. “Four minutes per side” is a rough guideline, not a guarantee. Patty thickness, meat temperature before cooking, grill temperature, wind conditions (if grilling outdoors), and fat content all change cooking time. A thick, cold patty on a windy day might need 7 minutes per side. Time is a hint. Temperature is the answer.
Using a fork to flip. Stabbing the patty with a fork punctures it and lets juices run out. Use a thin spatula and flip gently. One flip is ideal — two at most.
Skipping the thermometer entirely. Look, the “touch test” where you compare the firmness of meat to parts of your hand? It’s fun party knowledge but wildly inconsistent with ground beef. A patty with 90/10 lean-to-fat ratio feels completely different at the same temperature as an 80/20 patty. Just use a thermometer. They cost less than a pack of premium ground beef.
Temperature Guide at a Glance
For those who want the quick reference:
USDA Safe Minimum for ground beef burgers: 160°F (71°C)
Ground turkey/chicken burgers: 165°F (74°C)
Medium rare (NOT recommended for safety): 130–135°F
Medium (below USDA standard): 140–145°F
Medium well: 150–155°F
Well done (USDA recommended): 160°F+
Keep this as a mental bookmark. And if you’re someone who cooks different proteins regularly, having a reliable thermometer is just as important as having a good knife. The same tool you use for burgers works for checking your halibut, your flank steak, or your Thanksgiving turkey.
FAQ
Is a hamburger safe to eat at 145°F?
According to USDA guidelines, 145°F is not considered safe for ground beef. That temperature is the recommended minimum for whole cuts like steaks and roasts, where bacteria only exist on the surface. Since grinding distributes bacteria throughout the meat, the USDA sets the safe threshold for hamburgers at 160°F. Some restaurants serve burgers below this temperature with a consumer advisory, but for home cooking — especially with store-bought ground beef — sticking to 160°F is the smart move.
Can I eat a pink hamburger if it reaches 160°F?
Yes, you can. A burger that reaches 160°F is safe regardless of its color. Some ground beef retains a pinkish hue even at safe temperatures due to factors like pH levels, the presence of certain proteins, or the addition of ingredients like onions or peppers. If your thermometer confirms 160°F, the burger is safe to eat — pink or not.
How long does it take a burger to reach 160°F?
There’s no single answer because too many variables are involved. A standard ¾-inch thick patty on a grill preheated to 400°F typically reaches 160°F in about 4–5 minutes per side (8–10 minutes total). Thicker patties, colder starting temperatures, lower grill heat, or windy outdoor conditions all extend the cooking time. This is precisely why temperature measurement beats time-based cooking every time.
Do I need a special thermometer for burgers?
An instant-read digital thermometer is your best friend here. You don’t need anything fancy — models from brands like ThermoWorks, ThermoPro, or even basic kitchen store options work perfectly. The key features to look for are fast reading time (under 5 seconds), thin probe tip (to avoid making large holes), and an easy-to-read display. Avoid old-style dial thermometers for thin items like burger patties — they’re too slow and the probe is too thick.
What if I’m grinding my own beef at home?
Home grinding gives you more control over freshness and contamination. If you start with whole muscle cuts, keep everything cold (meat, grinder parts, bowl), and cook the burgers immediately after grinding, your risk of bacterial contamination drops significantly. Some food safety experts say freshly home-ground beef from clean whole cuts can be safely consumed at lower temperatures — but the USDA still officially recommends 160°F regardless of grinding method. If you choose to eat home-ground burgers below 160°F, understand that you’re accepting some level of risk.
Your Next Cookout Starts with a Thermometer
Getting the internal temperature of a hamburger right isn’t complicated, but it does require one small shift in habit — actually checking the temperature instead of guessing. A $15 instant-read thermometer is the single most impactful tool you can add to your grilling setup. It takes the guesswork out, keeps your family safe, and honestly, it helps you cook better burgers too.
Next time you’re standing over the grill, skip the poke-and-press routine. Slide that thermometer probe into the side of the patty, wait a couple of seconds, and let the number guide you. Hit 160°F, pull it off, let it rest on the bun for a minute, and enjoy a burger that’s both safe and satisfying.
And if you really want to level up your meat cooking game, start paying attention to the specific temperatures for everything you grill. Whether it’s pulled pork, pork chops, or a weekend brisket — the thermometer is always the answer. Trust the numbers, not your eyes.